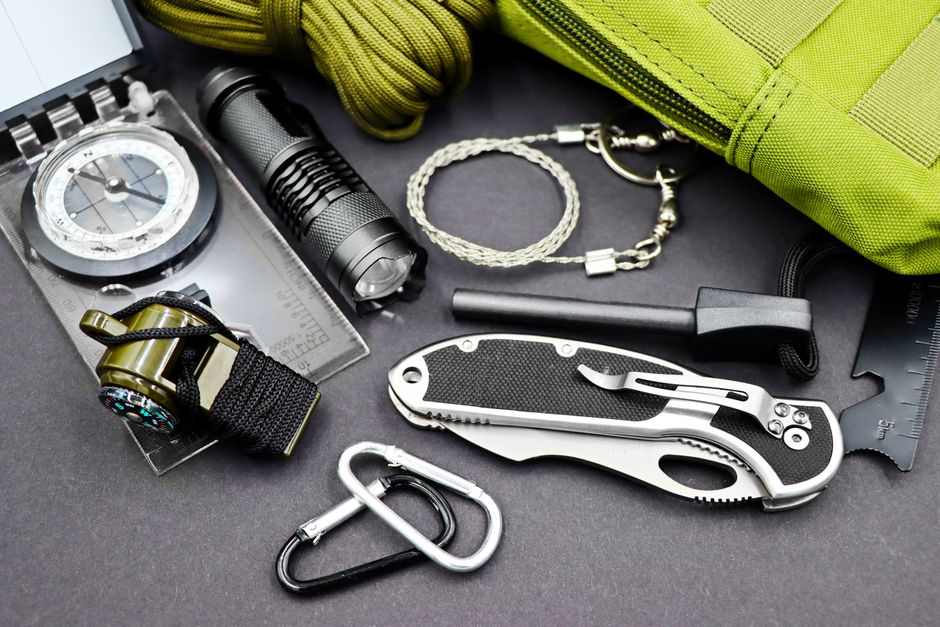
Your Complete Guide to Outdoor Survival Gear Categories
Understanding essential equipment types and building a reliable survival kit that keeps you safe in any wilderness situation
When you venture into the wilderness, your survival gear becomes your lifeline. But with countless products and conflicting advice, knowing what equipment you actually need can feel overwhelming. The key isn’t carrying everything possible—it’s understanding the essential categories of survival gear and selecting the right items within each one.
Survival gear falls into distinct categories based on fundamental human needs and wilderness challenges. Each category addresses specific survival priorities, from maintaining body temperature to signaling for rescue. By organizing your equipment this way, you’ll build a comprehensive kit without unnecessary weight or gaps in your preparedness.
This guide breaks down the core equipment categories every outdoor enthusiast should understand. You’ll learn what belongs in each category, why it matters, and how to choose gear that matches your skill level and environment. Whether you’re assembling your first survival kit or refining an existing setup, this systematic approach ensures you’re prepared for whatever nature throws your way.
Understanding the Survival Gear Framework
Effective survival gear organization follows the Rule of Threes—a principle that prioritizes your most immediate needs. You can survive three minutes without air, three hours without shelter in harsh conditions, three days without water, and three weeks without food. This hierarchy shapes how you should think about and organize your equipment.
Your survival gear divides into two main systems: your everyday carry (EDC) items that stay with you always, and your extended survival kit for longer emergencies. The EDC covers immediate threats, while your larger kit addresses sustained survival scenarios. Understanding this distinction helps you pack efficiently and access critical items quickly when seconds count.
Quality matters more than quantity in survival situations. One reliable multi-tool outperforms five cheap alternatives. Focus on gear that serves multiple purposes, withstands harsh conditions, and matches your actual skill level. The best survival equipment is what you know how to use effectively under stress.
The Core Categories System
Professional survival instructors organize gear into seven core categories: shelter and warmth, fire-starting, water procurement and purification, food acquisition, navigation and signaling, first aid and hygiene, and tools and repair. Each category addresses a fundamental survival need, and your kit should include redundancy in the most critical areas.
This systematic approach prevents both over-packing and dangerous gaps in your preparedness. When you evaluate your kit by category rather than by individual items, you quickly spot weaknesses. Missing a backup fire-starter becomes obvious when you review your fire category, even if your pack feels full.
Matching Gear to Environment
Your environment dramatically affects which categories need emphasis. Desert survival demands extensive water procurement gear, while arctic conditions require advanced shelter and warmth equipment. Coastal areas need different signaling devices than dense forests. Effective gear selection starts with honest assessment of where you’ll actually be traveling.
Create environment-specific loadouts rather than one universal kit. Your base categories remain the same, but the specific items and their quantities shift. This targeted approach reduces weight while increasing your actual preparedness for the conditions you’ll face.
Shelter and Warmth Equipment
Exposure kills faster than hunger or thirst. Your shelter and warmth category protects you from hypothermia, hyperthermia, and the elements. This category typically carries the most weight in your pack, but it’s non-negotiable for survival.
Emergency shelter ranges from lightweight tarps and emergency bivvies to robust tents and hammock systems. Your choice depends on climate, season, and how long you plan to be out. At minimum, carry something that creates a waterproof barrier between you and the ground, and another barrier against wind and precipitation from above.
Essential Shelter Components
A complete shelter system includes ground insulation, overhead protection, and cordage for construction. Space blankets and emergency bivvies provide last-resort options that weigh mere ounces. For planned trips, upgrade to a quality tarp (10×10 feet minimum) or lightweight tent that suits your environment.
Don’t overlook ground insulation—cold ground saps body heat faster than cold air. Closed-cell foam pads work in any condition and double as splints or pack frames. Inflatable pads offer more comfort but require careful handling and repair capabilities.
Carry 50-100 feet of paracord or bankline for shelter construction, gear repair, and countless other uses. Learn basic knots and tarp configurations before you need them. Your shelter is only as good as your ability to deploy it quickly in deteriorating conditions.
Warmth and Insulation Gear
Layered clothing systems regulate body temperature more effectively than single heavy garments. Your warmth gear should include a moisture-wicking base layer, insulating mid-layer (fleece or down), and weatherproof outer shell. Pack extra socks and a warm hat—you lose significant heat through your head and feet.
Emergency warmth items include chemical heat packs, additional space blankets, and a lightweight down jacket that compresses small. In cold environments, consider a sleeping bag rated 10-20 degrees below the lowest temperature you expect. Being too warm is fixable; being too cold is dangerous.
Fire-Starting Equipment
Fire provides warmth, water purification, signaling capability, and psychological comfort. Your fire category should include multiple ignition methods because wet conditions, altitude, and stress can make fire-starting challenging even for experienced outdoorspeople.
The principle of redundancy matters most here. Carry at least three different fire-starting methods: a reliable lighter, waterproof matches in a sealed container, and a ferrocerium rod. Each method works under different conditions and skill levels. Lighters fail at altitude and in extreme cold, matches get wet, but ferro rods work in nearly any condition if you have the skill.
Primary Fire-Starting Tools
Your primary fire-starter should be what you’re most confident using. For most people, that’s a quality butane lighter—cheap, reliable, and requiring minimal skill. Carry two lighters in different locations so losing one doesn’t leave you without fire.
Waterproof matches provide a backup that works when your hands are cold and coordination is compromised. Store them in a waterproof container with striker surfaces inside and out. NATO-style lifeboat matches burn even in wind and rain, making them worth the extra cost for serious wilderness travel.
Ferrocerium rods generate 3,000-degree sparks regardless of weather or altitude. They require practice and proper tinder, but they’re nearly indestructible and provide thousands of strikes. Pair your ferro rod with a quality striker or the spine of your knife.
Tinder and Fire-Building Materials
Ignition sources mean nothing without proper tinder. Carry commercial fire-starters like petroleum-soaked cotton balls, jute twine, or commercial tinder tabs. These materials catch sparks easily and burn long enough to ignite kindling, even when natural tinder is wet.
Fatwood (resin-rich pine wood) provides natural, waterproof tinder that ignites easily and burns hot. A few pieces in your kit ensure you can start fire even after days of rain. Learn to identify and prepare natural tinder in your region, but always carry backup materials.
Water Procurement and Purification
Water is your second survival priority after shelter. Dehydration impairs judgment, reduces physical capability, and can kill within three days. Your water category must address both finding water sources and making that water safe to drink.
Carry more water capacity than you think you need. A minimum of two liters for day trips, more for arid environments or strenuous activity. Collapsible water containers add capacity without bulk when empty. Know your environment’s water sources before you go—desert travel requires completely different water strategies than forest hiking.
Water Purification Methods
Your kit should include at least two purification methods. Chemical treatments (iodine or chlorine dioxide tablets) are lightweight and foolproof but require waiting time. Filters provide immediate drinking water and remove sediment but can freeze or clog. UV purifiers work quickly but need batteries and clear water.
Boiling remains the most reliable purification method when you have fire and a metal container. One minute of rolling boil kills all pathogens at any altitude below 6,500 feet. Above that elevation, boil for three minutes. A metal water bottle or cup serves double duty for boiling and drinking.
Carry backup purification tablets even if you prefer filters. Tablets weigh almost nothing and work when filters break or freeze. Understand each method’s limitations—filters don’t remove viruses, chemicals don’t remove sediment, and UV requires clear water to be effective.
Water Collection Tools
Beyond purification, you need ways to collect and transport water. A collapsible bucket or large water bladder lets you gather water from shallow sources. Clear plastic sheeting can create solar stills or collect dew and rainwater. A bandana or coffee filter pre-filters sediment before purification.
In arid environments, consider including a transpiration bag—a clear plastic bag that collects moisture from plant leaves. While slow, this method provides water when surface sources are unavailable. Learn multiple water procurement techniques because your environment determines which methods work.
Food Acquisition and Preparation
While you can survive weeks without food, maintaining energy and morale matters for both short-term performance and long-term survival. Your food category includes both packed provisions and tools for acquiring wild food.
Pack calorie-dense, non-perishable foods that require minimal preparation. Energy bars, nuts, dried fruit, and jerky provide quick energy and pack efficiently. For longer trips, add freeze-dried meals that only need hot water. Calculate at least 2,000-3,000 calories per day for moderate activity, more for cold weather or strenuous travel.
Food Procurement Tools
Basic fishing gear weighs little and provides protein in many environments. A compact fishing kit should include hooks in various sizes, line, split shot weights, and a few lures or artificial bait. Add a gill net for passive fishing if regulations allow and you have the skill to use it effectively.
Snare wire enables passive trapping of small game. Twenty feet of brass wire weighs almost nothing but requires knowledge of animal behavior and local regulations. Never rely on trapping as your primary food source—success rates are low even for experienced trappers.
A quality knife serves countless food preparation tasks from cleaning fish to processing plants. Your primary knife should be fixed-blade, full-tang, and 4-6 inches long. Pair it with a small folding saw for processing larger game or cutting bones.
Cooking Equipment
A metal container for boiling water and cooking food is essential. Stainless steel water bottles double as cooking pots. Dedicated camping cookware offers better performance but adds weight. At minimum, you need something that can boil water safely over fire.
Portable stoves provide reliable cooking when fire isn’t practical or allowed. Compact canister stoves work well in most conditions, while liquid fuel stoves perform better in extreme cold. Carry extra fuel—running out means cold food and unpurified water.
Navigation and Signaling Equipment
Getting lost transforms a day hike into a survival situation. Your navigation category prevents that scenario, while your signaling gear helps rescuers find you if prevention fails. These categories often overlap but serve distinct purposes.
Never rely solely on electronic navigation. GPS devices and smartphone apps are valuable tools, but batteries die, devices break, and satellites can be unavailable. Always carry and know how to use a map and compass appropriate for your area. Topographic maps show terrain features that help you navigate and identify water sources.
Core Navigation Tools
A quality baseplate compass and topographic map form your primary navigation system. Learn to take bearings, triangulate your position, and follow a course before you need these skills under stress. Laminate your maps or store them in waterproof cases—wet paper tears easily and becomes unreadable.
GPS devices and smartphone apps provide convenient navigation but should supplement, not replace, traditional tools. Carry extra batteries or a solar charger for electronic devices. Download offline maps before your trip—cellular coverage is unreliable in wilderness areas.
A simple watch helps with navigation through sun position and timing. Analog watches work better than digital for this purpose. Understanding basic celestial navigation provides backup when all tools fail—the sun rises east and sets west, while the North Star indicates true north in the Northern Hemisphere.
Signaling Devices
Signaling equipment helps rescuers locate you. A whistle carries farther than your voice and requires less energy. Three blasts is the universal distress signal. Choose a pealess whistle that works when wet and won’t freeze in cold weather.
Signal mirrors reflect sunlight visible for miles. Practice aiming reflected light before you need this skill. Even a small mirror can attract attention from aircraft or distant search parties. Carry a dedicated signal mirror with aiming hole for best results.
Bright colored items improve visibility from air and ground. An orange or bright yellow tarp, bandana, or clothing item stands out against natural backgrounds. Chemical light sticks provide nighttime signaling without fire. Flares work for emergency signaling but have limited uses and shelf life.
Modern Personal Locator Beacons (PLBs) and satellite messengers provide direct communication with rescue services. These devices work globally and can save your life, but they’re not substitutes for prevention and basic survival skills. Register your PLB before your trip and understand how to activate it properly.
First Aid and Hygiene Supplies
Medical emergencies in the wilderness require immediate response—help may be hours or days away. Your first aid category addresses injuries and illnesses until you can reach professional care. Even minor injuries become serious without proper treatment in backcountry conditions.
A comprehensive first aid kit scales with trip length, group size, and remoteness. At minimum, include supplies for bleeding control, wound care, blister treatment, pain relief, and any personal medications. Wilderness first aid differs from urban first aid—you must stabilize and care for patients over extended periods.
Essential First Aid Components
Bleeding control items are your highest priority. Include multiple sizes of sterile gauze pads, rolled gauze, trauma dressings, and medical tape. A tourniquet can save lives from severe limb bleeding—learn proper application before you need it. Hemostatic gauze accelerates clotting for serious wounds.
Wound care supplies prevent infection in the field. Antiseptic wipes, antibiotic ointment, and various sizes of adhesive bandages handle minor injuries. Include butterfly closures or wound closure strips for deeper cuts. Irrigation syringes help clean wounds thoroughly.
Blister prevention and treatment deserve special attention—blisters can end your trip or create dangerous mobility issues. Carry moleskin, blister pads, and medical tape. Address hot spots immediately before they become full blisters. Extra socks and properly fitted boots prevent most blister problems.
Include pain relievers (ibuprofen and acetaminophen), antihistamines for allergic reactions, anti-diarrheal medication, and any personal prescriptions with extras. A small bottle of hand sanitizer prevents illness. Add tweezers for splinters, scissors for cutting tape and gauze, and safety pins for securing bandages.
Hygiene and Sanitation
Maintaining hygiene prevents illness and infection. Pack biodegradable soap, a small towel, and toilet paper in a waterproof bag. A lightweight trowel enables proper waste disposal—dig catholes 6-8 inches deep and at least 200 feet from water sources.
Dental hygiene matters for longer trips. A small toothbrush and travel toothpaste prevent dental problems that can become excruciating in the field. Dental floss serves double duty for tooth care and emergency cordage or sutures.
Sun and insect protection prevent miserable conditions. Sunscreen prevents burns that impair your ability to travel and sleep. Insect repellent containing DEET or picaridin protects against disease-carrying insects. A head net weighs almost nothing but makes life bearable in heavy mosquito areas.
Tools and Repair Equipment
Your tools category includes cutting implements, repair materials, and multi-purpose items that support all other categories. Quality tools multiply your capabilities and enable you to adapt to unexpected situations.
A fixed-blade knife is your most important tool. Choose a full-tang design with a 4-6 inch blade made from quality steel. Learn proper knife skills including safe handling, sharpening, and maintenance. Your knife processes food, builds shelter, prepares tinder, and handles countless other tasks.
Cutting and Processing Tools
Beyond your primary knife, a small folding saw cuts wood more efficiently than any knife. Compact folding saws weigh little and cut branches for shelter construction and firewood. A multi-tool provides pliers, screwdrivers, and additional blades in one compact package.
Carry a knife sharpener appropriate for your blade type. A dull knife is dangerous and inefficient. Small diamond stones or ceramic rods work well for field sharpening. Practice sharpening at home until you can maintain a working edge.
Hatchets or small axes add wood processing capability but increase weight significantly. Only carry these for extended trips or winter camping where you’ll need substantial firewood. Learn proper axe safety and technique—axe injuries in the wilderness are serious emergencies.
Repair and Maintenance Items
Duct tape repairs gear, creates bandages, and solves countless problems. Wrap 10-20 feet around a water bottle or trekking pole rather than carrying a full roll. Add tenacious tape for fabric repairs—it bonds better than duct tape to technical fabrics.
Cordage serves endless purposes. Carry paracord (50-100 feet), bank line or tarred nylon twine (50 feet), and wire for repairs. Each type has different strengths and applications. Learn basic knots and lashing techniques to maximize cordage utility.
A basic sewing kit repairs clothing and gear. Include heavy-duty needles, thread, and safety pins. Add a few feet of dental floss for heavy repairs. Seam sealer fixes waterproof gear. Super glue bonds many materials and can even close small wounds in emergencies.
Spare parts for critical gear prevent single-point failures. Extra batteries for lights and GPS, replacement water filter elements, stove repair kits, and spare tent stakes weigh little but can save your trip. Identify your gear’s weak points and carry appropriate spares.
Lighting and Power Equipment
Darkness in the wilderness is absolute. Your lighting category enables navigation, camp tasks, and signaling after sunset. Modern LED technology provides reliable, efficient lighting, but you need backup systems and power management strategies.
A quality headlamp keeps your hands free for tasks. Choose models with multiple brightness settings to conserve battery life. Red light modes preserve night vision while providing enough light for camp tasks. Carry a backup flashlight or small secondary headlamp—losing your only light source creates dangerous situations.
Lighting Systems
LED headlamps balance brightness, battery life, and weight effectively. Look for models with at least 200 lumens maximum output, multiple brightness levels, and good battery life on lower settings. Waterproof or water-resistant construction prevents failure in wet conditions.
Backup lighting should use different battery types than your primary light. If your headlamp uses AAA batteries, choose a backup that uses AA or has a built-in rechargeable battery. This prevents a single battery type shortage from leaving you without light.
Consider a small lantern for camp lighting. Hanging lanterns illuminate larger areas than headlamps and save your primary light’s batteries. Collapsible solar lanterns provide light without battery concerns for extended trips.
Power Management
Carry spare batteries for all electronic devices. Store batteries separately from devices to prevent accidental drainage. Cold weather dramatically reduces battery performance—keep spare batteries warm in an inside pocket.
Solar chargers and power banks extend electronic device capability for longer trips. Choose solar panels with enough wattage to actually charge devices in realistic conditions. Power banks should have capacity to fully charge your critical devices at least once.
Prioritize power for essential devices. GPS, satellite communicators, and headlamps take precedence over cameras and entertainment devices. Understand each device’s power consumption and plan accordingly. Turn off devices when not in use and reduce screen brightness to extend battery life.
Building Your Personal Survival Kit
Understanding equipment categories is just the beginning. Now you need to assemble these components into a functional system that matches your needs, skills, and environment. Your survival kit should evolve as you gain experience and as your adventures change.
Start with the basics in each category, then add items as you identify needs through actual field experience. Don’t buy everything at once—quality gear is expensive, and you’ll make better choices as you learn what actually works for you. Begin with day trips using minimal gear, then gradually extend your range and duration as your kit and skills develop.
Layered Kit Approach
Organize your gear in layers based on accessibility and likelihood of need. Your everyday carry (EDC) includes items you keep on your person always—knife, fire-starter, whistle, and basic first aid. These items handle immediate threats and stay with you even if you’re separated from your pack.
Your pack’s main compartment holds category-specific items organized in stuff sacks or pouches. Group related items together—all fire-starting materials in one bag, first aid in another. This organization lets you find items quickly and assess your kit by category.